
Day 1-
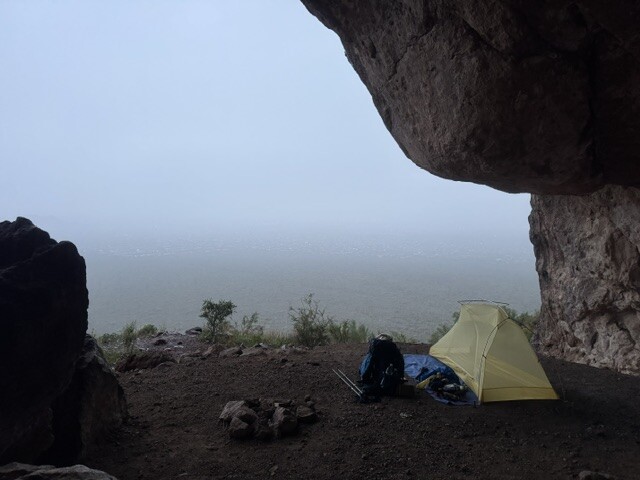
Start at the Massacre Falls TH, after hitting the falls (which rarely have water flowing), take an off trail bush whack to connect to a social trail near the Praying Hands. Joining a small piece of the Treasure Loop Trail, before intersecting with the Prospector Trail, then Siphon Draw. Go touch the z gate, the start of the Siphon draw at the edge of the Lost Dutchman State Park boundary, before turning around and heading up to the Flatiron and the start of the Ridgeline Trial. You might find a small pool of water in the Siphon Draw basin, otherwise do not expect to see what until you pass the Carney Springs junction. Take the Ridgeline to 5057, the highest peak in the Western Supes, summit for amazing 360 degree views. Continue down the Ridgeline to the 3 Sisters junction and enjoy the view from the south facing cliffs. Backtrack to the Ridgeline and continue down the trail to the Carney Springs junction. Pass the Carney Springs junction and make your way up a social trial canyon to the "Death Bunny", before backtracking to Carney Springs and ending at the Carney Springs/ Wave Cave parking lot. Plenty of flat spots to camp on the trail just before reaching the parking lot. Cache water here. 20 miles, 7,228' elevation gain.
Day 2-
Start up Carney Springs to the Wave Cave, backtrack back down the Wave Cave trail to the Lost Goldmine Trail and head west to the Hieroglyphics trail. Follow a trail up the canyon to the Ridgeline Trail, and backtrack back to the Hieroglyphics trailhead. This is an out-n-back, so feel free to slack pack. You should have water on the Hieroglyphics trail. From here the trail gets tricky. You have to road walk through the neighborhood, but (the GAIA track) shows the trial leaving the road, and cutting through private property (houses exist here now). Evidently, the property owner will shoot you if you cut through his land, according to locals. I continued down the paved road another ¼ mile and took a dirt road back to the Lost Goldmine Trail. This also appeared to be private property, but it was in an open area, away from houses, and I saw no other way to get to the actual trail. Follow the Lost Goldmine northwest to the Broadway Cave trail, do a quick out-n-back to the TH, and make your way to the Broadway cave to camp for the night. Broadway Th or the Jacob’s Crosscut intersection is a good spot for a water cache. This area is dry. 19.8 Miles, 4,787’ elevation gain.
Day 3-
Continue along the Jacobs Crosscut Trial to the Treasure loop trail, head west to the start of the Treasure Loop and hit the bathrooms and water fountain at Lost Dutchman State Park. After loading up on water, complete the Treasure Loop, and continue to follow Jacob’s Crosscut to the TH. Road walk along Frist Water Road to the First Water trailhead, and take the Dutchman #104 trail to the Black Mesa Trail, back to the Second Water Trail for a loop back to the First Water trailhead. Road walk to the First Water horse trailer parking lot to pick up the start of Hackberry Springs Trail. Hike to Hackberry Spring, a reliable water source and camp for the night. 22.9 mi, 2,486’ elevation gain.
Day 4- Continue along Hackberry Springs to the Second Water Trail. Take Second water to Boulder Canyon and head north towards Canyon Lake. Canyon lake is an out-n-back, so this is a good time to slack pack. Canyon Lake Marina has a general store, not enough to resupply in a meaningful way, but they have a limited supply of snacks, water, Gatorade and cold beer, like a very small gas station might have. Return to Boulder Canyon and head up the western side of Battleship Mountain to the south end to begin the scramble up battleship to the summit. Another slack pack opportunity. After summitting, continue along Boulder Canyon to Bull Pass, to Dutchman 104 and head towards Charlebois Spring to camp for the night. There should be water flowing in this canyon if you timed the rain correctly. 22 mi, 6,105’ gain.
Day 5- Backtrack along the Dutchman 104 trail to the Cavalry Trail, connecting back to the Dutchman 104 trail for a short out-n-back to the Terrapin Trail junction. Backtracking on Dutchman 104 to the Peralta Canyon trial, head up Peralta Canyon to the Freemont Saddle, taking the Cave Trail (a social trail) until it runs into the Bluff Springs Trail, which you will follow to the Peralta Canyon TH. This is another good spot for a water cache (bathrooms here as well). From here, you will head up the Peralta Canyon trail back to the Freemont Saddle, this time taking the social trail towards Robber’s Roost in an effort to reach the “Death Bunny” spot you touched on day one. This is a great place to camp. There will be water puddles close by, if you time the rain correctly. 21 mi, 4,678’ elevation gain.
Day 6- Return on the Robber’s Roost trail and back down Peralta Canyon to the Peralta Canyon Trailhead, where you will pick up the Bluff Springs Trail, to the Terrapin Trail to Dutchman 104. Follow Dutchman 104 to the Bluff Springs Trail Junction for an out-n-back on the Dutchman 104 to Whiskey Springs. Once you return, head down the Bluff Springs trail to the Peralta Canyon TH for a well deserved resupply. Arrange a ride into nearby Apache Junction for laundry and resupply. 22.3 mi, 3,542’ elevation gain.
Day 7- Zero Day
Day 8- Start out at the Peralta trailhead on the Dutchman 104 towards Whiskey Springs, take the Whiskey Springs trail to the Red Tanks trail, heading left towards the Peters Trail. Hike the entire Peter’s trial, a not-often traveled trail that is well cairned where needed, until it connects to the JF Trail. There is no water along Peter’s Trail. Take the JF trail a short distance to the Hoolie Bacon Trail, hiking the full Hoolie Bacon trail to the Red Tanks intersection. Heading west on the Red tanks trail, there is a nice camp spot about 100 yards from the intersection, easy to see from the trail and hard to miss if you are looking. Water should be available at the nearby La Barge creek if you timed the water availability correctly. 24.1 mi, 4,581’ elevation gain.
Day 9-
Continue on the Red Tanks trail to the Coffee Flat trail, to the JF Trail. Head up the JF Trail to Tortilla Pass, and do a rough out-n-back down the Rogers Canyon trail to Angel Basin. Return to the JF trail and hike back to the Hoolie Bacon intersection. Look for water along JF near Clover Spring and fill up. Easy flat spot at the intersection to pitch a tent, but no water. 22.1 mi, 4,789’ elevation gain.
Day 10-
Hike the entire Hoolie Bacon trail (again) to the Red Tanks intersection, heading West on Red Tanks this time to Whiskey Spring. This completes a gorgeous and rugged section of the upper La Barge box previously missed. Take Whiskey Spring back to Dutchman 104, to the Coffee Flat trail junction. Take Coffee Flat to the Woodbury TH and camp for the night. This is a good spot for a water cache, though I did see water available here at a cattle trough (unsure of reliability) close to the Woodbury/Coffee flat intersection. 19.4 mi, 3,495’ elevation gain
Day 11-
Start on the Woodbury Trail to Roger’s Trough. You’ll hit a dirt road before hitting Roger’s Trough, nice clear road walk to climb first thing in the morning. After a short hike on the Reavis Ranch Trail, take the Rogers Canyon trail to Angel basin. Be sure to visit the “mud house” 600 yr old native American cliff dwelling ruin. From Angel Basin, good luck finding the Frog Tanks trail. This is one of the most overgrown and hard to follow trails in the Superstitions. Follow Rogers Creek if you can’t find the trail. Eventually, Rogers Canyon turns into Fish Creek and the Frog Tanks climbs out of Fish Creek to a short connector trail called Plow Saddle. Follow this trail up to Reavis Ranch 109 and enjoy the beautiful views along the well-maintained trail to the Reavis Northern TH. This is another good spot for a water cache. 23.6 mi, 4,118’ gain.
Day 12-
Backtrack on Reavis Ranch 109 past the Plow Saddle Junction to the Frog Tanks trail. Do a quick out-n-back on the Frog Tanks to Plow Saddle, before continuing on the Reavis Ranch trail to the Reavis Gap Trail. Take the Reavis Gap to the Two Bar Ridge trail north to the Tule Trial. Great spot to end, no water available here. Limited resupply is possible at the Roosevelt Marina, bar and grill here, though the small market has limited hours. Assuming you finish at the end of a long day, hitching to the hwy will be impossible after dark. If you wait until morning, you can road walk to the hwy and hitch to Roosevelt or consider hitching to Globe in the opposite direction for a better resupply where a zero might be possible: 26.6 miles, 5,038’ elevation gain.
Day 13- Zero Day
Day 14- Start along the Arizona Trail at Roosevelt Lake ( I hiked the Frazier Trail and looked for the Thompson trail, though both are outside of the Superstition Wilderness area). Take the Arizona Trail to the border of the Superstitions, now the Two Bar Ridge trial, continue to the Reavis Gap junction. Pull water from Walnut Spring and find a place to camp near the trail junction. There is a nice spot just on top of the saddle on the Reavis Gap trail just past the Two Bar Junction. 20.7 mi, 6,276’ gain.
Day 15-
Continue on the Reavis Gap Trial to the Campaign Trail for an out-n-back to the Campaign trailhead. Return to the Reavis Gap intersection and head down the entire length of the Campaign trial until it ends at the West Pinto Creek Trail. Nice large camp spot here and water should be running in the creek. Campaign is very overgrown in areas and not well travelled. Expect a slower pace. 15.9 mi, 2,670’ gain
Day 16-
Head out on the totally overgrown and impossible to follow Cuff Button trail for a long out-n-back. Once you return, go back on the Campaign trail to a nice camp spot at the Fireline Trail junction. Water might be spotty here, if you see any water fill up – you may not see water again until Reavis Creek in Reavis Ranch on day 17. 19.2 mi, 5,232’ gain.
Day 17-
Start off on the Fireline Trail, taking the social trail for an out-n-back up to Circlestone. Head to the Reavis Ranch trail for an out-n-back to the Reavis Gap Trail intersection. Continue along the Reavis Ranch trail to Rogers Trough and road walk to the Spencer Springs, most of which is along the AZT. Spencer Springs is very overgrown and difficult to get through. Be prepared for hard miles. Arrive back at the camp spot from Day 15, at the Campaign Trail intersection. Should still have water here. 23.1 mi, 4,118’ gain.
Day 18-
Out-n-Back on the complete West Pinto Creek trail. Very overgrown for 5-6 miles, challenging to navigate, total bushwhack. Fill up water at Rogers Canyon before returning. Once back at camp, continue up the creek bed to the Miles Ranch TH. Cache water here, or bring water with you to a dry camp. Cool old barn nearby for a scenic camp spot. 19.1mi, 4,183’ gain
Day 19-
Take the Bull Basin trail to Haunted Canyon and be prepared. Bull Basin might be the worst trail in the Superstitions. Walls of overgrowth make trekking slow and dangerous. Make your way to Toney’s Cabin, before turning around and connecting to the Paradise Trail. Well maintained, you’ll make good time to the trailhead where you can road walk to the Norther Haunted Canyon TH. Do a short out-n-back on Haunted Canyon to the Paradise Trail intersection before returning to the finish line. 18.5 mi, 4,834’ gain.
Note: There is some confusion on the Haunted Canyon trail, some maps only show an upper trailhead and others show a lower trailhead. Some show both, other show only one. With dirt roads passing through an active mine, roads are moving and trailheads may change. Be careful when planning a pick up to make sure you are on the same page with your ride.
360.5 mi, 78,403' gain, 77,246' loss Avg daily miles: 21.2 Avg daily elevation gain: 4,612' Longest Day: 26.6 mi Most elevation gain in a day: 7,228'